
An introduction to UE Explorer
May 24, 2012For years people have been looking and trying to make a decompiler for UnrealScript for games such as Unreal Tournament 3 etc, as of 5 April this has became true, I have released my first C# program called UE Explorer.
For all the new people to this area, you'll probably ask what's a decompiler? A decompiler is a program that does the opposite of a compiler, which is converting all those bytes back into readable code as it was before it converted all those text structures into bytecodes.
However this isn't exactly the point of this article, in this article I'll demonstrate some of the less known features of UE Explorer that provide you more insight into how bytecodes work and all that fancy technical stuff :)
View Tokens
Let's take a look at the Subtract_LinearColorLinearColor operator in the UDK Core file:
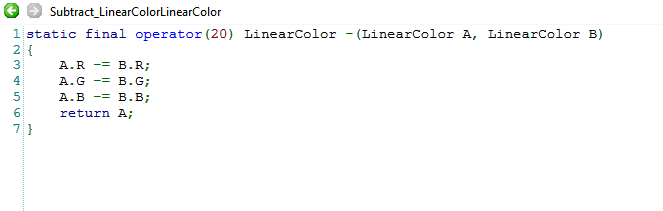
This is the code that gets executed whenever you subtract a LinearColor instance with another LinearColor instance. K good to know if you are learning UnrealScript, but I'm just showing this to you so we can go through on how it looks in bytecodes.
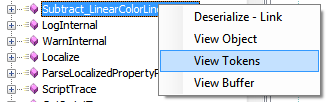
UE Explorer has this amazing fancy feature called "View Tokens" you can find this when you right click on a function and then click on "View Tokens" this will decompile the function as above but this time it will output the tokens order as well.
Once done you will see this:
You'll probably click right away when you see this "mess" but let's just take a closer look at what this actually all means.
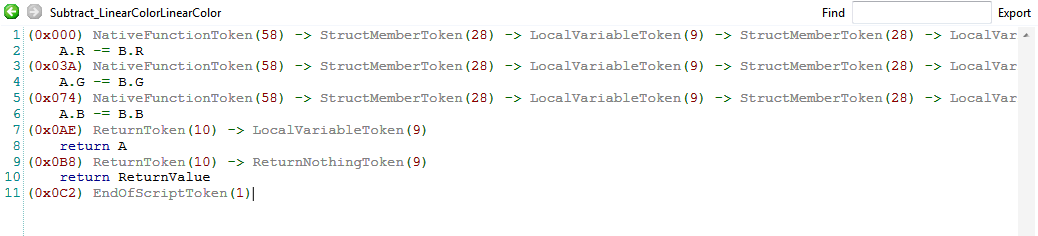
Let's start with the first line, the first thing you see is (0x000) this is the relative stream position in hexadecimals where the first bytecode starts. The next thing you see is "NativeFunctionToken" this is the name of the first bytecode found at 0x000, what is a "NativeFunctionToken"? This token is the "-=" operator you see below that line, very simple right? Except for orders :P The next token you see is a "StructMemberToken" now this is probably self explantory now, and well yeah it is, this is the first "R" you see below that line, where the "A" is the next "LocalVariableToken", and the dot is added by the "StructMemberToken", now this repeats exactly the same for the right operand.
Looking a bit down at (0x0AE) you will see the "ReturnToken", and once again this is very self explanatory now, all thanks to this "View Tokens" feature :), and finally we see "EndOfScriptToken" and that's where the function completely stops!
So yeah now we know all that but what's the point? I don't know about you but I have found this to be useful when debugging the bytecode structure in Unreal Engine 3, I first worked out the Unreal Engine 2 bytecodes and then moved onto UE3 with the help of this utility I could spot where it went wrong much quicker! Especially if I have to support other games I begin using this feature when I see a decompiling problem. Now that's my advantage, but for you this might be just fancy and useful if you are willing to understand how languages work behind the scenes etc.
View Buffer
The next feature is called "View Buffer" and is invoked the same way as "View Tokens" except this one can be performed on all objects such as Properties, Classes and Functions. "View Buffer" isn't exactly self explantory on what this might be, but many people might recognize this as a Hex-Editor however in this case it doesn't edit but only view hence "View".
With this tool you can see all the bytes from the selected object and thus research the meanings with the help from my Hex-Viewer which looks as follows:
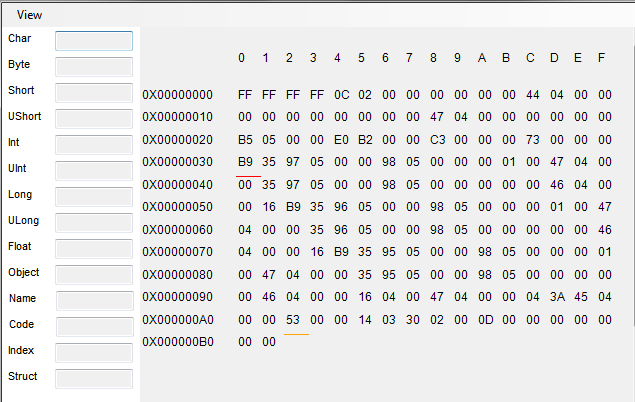
You'll find this confusing for sure well unless you are a reverse-engineer :P But for those who are new to this, this basically lets you test possible meanings of bytes that belong to this object, which is the LinearColor function btw. You might have noticed that red underline, this line indicates the start point of the bytecodes where the orange underline is the end of the bytecodes. Now what's the rest? The rest are simple the general info all object shares that tell who the parent and outer of this object/function are.
Let's use this tool by starting at B9(the red underlined byte), click on it, and take a look at the left side group, and look down to "Code", like this:
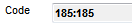
It says 185:185, not self explantory, but we know this is the start point and as we learned from "View Tokens" we this must be a "NativeFunctionToken", this means the number 185 or 0xB9 is the bytecode for "-=", this token indicates the start of a native function call and is sure followed by more data, so let's click on the next byte which is 35:

"StructMember", this is what the number 53 or hex 0x35 means, meaning the "-=" is a subtraction from a member of a "Struct", let's find this struct's name by clicking on the next byte again

"R" is the member we're subtracting from, ok cool, and since "R" is a object reference, this means it's 4 bytes long, so we have to skip 4 bytes to get to the next instruction, as we do that we'll see it say "LinearColor" as "Object", this is a reference to the "Struct" type of member "R" which was basically already figured out by UE Explorer as you see above. Skip the next 5 bytes, to position 60.
![]()
0x00 or just number zero means "InstanceVariable" this is what we want, this means the data after this token references a object that is part of a function, which we know due "View Tokens" as "A", so lets click the next byte and UE Explorer will tell us this is "Object.Subtract_LinearColorLinearColor.A", and this is how that whole line is basically constructed!
Connecting "UE Viewer" to "UE Explorer"
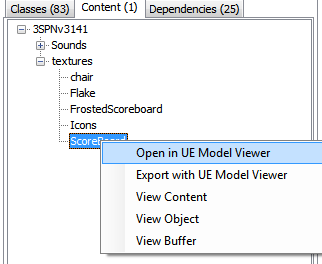
I have developed a cool easy feature for UE Explorer, this feature lets you bind UE Viewer together with UE Explorer, this way you can explore meshes and texture packages much easier, in fact it's as easy as clicking "View in UE Viewer" on any node within the "Content" tab, this will simply call UModel.exe with the correct parameters to show you the mesh or texture!
You can configure this feature in Options then click on the tab "UE Explorer".

Click on the "..." button, and find UModel.exe, the textbox will turn green to indicate the path is valid, or red if invalid, if it's valid then go ahead and click on "Save" and yeah that's it, now it's binded and we can go on and try this feature, so let's open a package with meshes.
Excuse me for "Export with UE Model Viewer" this is disabled in the public release at the moment!
Once clicked "UE Viewer" will do its job:

Voila! Now you can browse textures and meshes very easily :)
I hope you enjoyed reading this and hope you make use of the many features built in UE Explorer!